


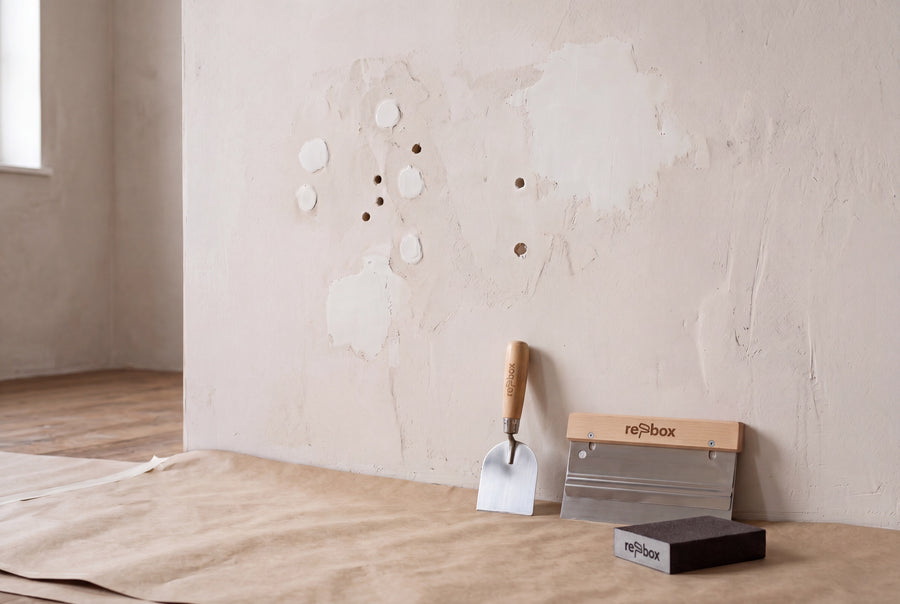
Nobody photographs a wall before it's painted — yet this step decides the result all the same. Six items make up this category: filler, two tools for applying and taking it out, two sanding blocks in different grits and a cloth for removing dust. Together, they bring a wall to the state where paint rewards it instead of exposing it.
Buy filler and filling tools
At the heart of the category is the Spachtelmasse repair filler 1 kg: easy to work with, strong filling power, made for cracks, drill holes and unevenness indoors. How far one kilo goes depends on what you're filling: a few drill holes and cracks are a different matter from a wall being levelled across its whole surface.
Alongside it, there's the Doppelfederspachtel for applying and smoothing, the Heber für Spachtelmasse for taking filler cleanly out of the container, the sanding blocks in two grits, and the Mikrofasertuch 40x42 cm for the dust that sanding inevitably creates.
Why raking light finds every dent
A wall almost always looks flat when viewed head-on. It gets tricky when light sweeps across it at a low angle: a window wall in the late afternoon, a hallway wall under a ceiling spotlight, a wall opposite a balcony door. Then every dent casts a small shadow, and every spot that's been filled but not sanded flush casts a small bump.
That's why checking before you fill matters more than the filling itself. In the evening, hold a lamp flat against the wall from the side and mark what you see in pencil. North-facing rooms are more forgiving, since their light stays soft and even. South-facing rooms, on the other hand, only need that one hour in the afternoon when the sun comes in low — and you'll see every spot you missed.
The six items and what you need them for
Spachtelmasse repair filler 1 kg
The filler for cracks, drill holes and unevenness. Apply it in thin layers rather than one thick one — several thin layers shrink less and are easier to sand flush. Fill each hole slightly above wall level so you can sand it smooth afterwards.
Doppelfederspachtel
The tool that puts the filler onto the surface and takes it off again. Hold it flat and draw it through in one motion, rather than going back and forth. Wipe the edge after each pass: dried residue on the blade leaves ridges in the next stroke.
Heber für Spachtelmasse
Sounds like a small detail, but it saves material. With the Heber für Spachtelmasse, you take exactly the amount you need from the container cleanly, without contaminating the rest with dust or filler that's started to set.
Sanding block, 120 grit
The coarser of the two. The Sanding Block – Grit 120 takes down ridges, evens out the edges of old paintwork and takes the shine off glossy old surfaces, so the new paint can grip.
Schleifblock Körnung 220
The fine one for the final pass. With the Sanding Block – Grit 220, you go over the filled areas until your finger no longer feels the transition to the wall. What your finger finds, the light will find too, later.
Mikrofasertuch 40x42 cm
After sanding, dust sits on the wall, and paint doesn't stick to dust. The washable cloth picks it up, used slightly damp. You'll find more on this in the Cleaning & Care category.
Which damage means which amount of work
- ✔️ Drill hole: blow it out, fill it, let it sit slightly proud, then sand flush with grit 220.
- ✔️ Wall plug hole with a chipped edge: remove any loose bits, fill in two layers, work over first with 120, then with 220.
- ✔️ Hairline crack: open it up carefully so the filler has something to hold onto, then fill and smooth it off.
- ✔️ Unevenness after removing wallpaper: apply a thin layer of filler over the whole area — you'll find how to get the surface clean beforehand in Tapete richtig entfernen.
- ✔️ Old, glossy surface: don't fill it, sand it lightly instead and remove the dust.
What's waiting for you in each room
Wohnzimmer
Picture rails, shelves, TV mounts: in the living room, the drill holes often all sit on the same wall. Work through them in one go, rather than tackling each hole separately.
Schlafzimmer
Usually just a few spots, but larger ones — behind the headboard, on the wardrobe wall. If you're sanding anyway, take in the whole wall surface, so the sheen stays even afterwards.
Küche
Lots of small marks tend to sit around wall cabinets and rails. Check here for grease residue too: neither filler nor paint will hold on a greasy surface.
Flur
Door frames, corners and edges are the spots that take the knocks of everyday life. Fill chipped outer edges in two layers and smooth them straight with the filling knife, guided along a batten.
Sanding, dusting, priming — the order that follows
After sanding, the dust needs to go, and only then the paint. On strongly absorbent or fresh plaster, and on walls filled over a large area, a primer is worth it: it ensures even drying and reduces consumption. What you need for that is under Grundierung & Vorbereitung.
If you want the surface to look especially calm afterwards, re-box prime WEISS (matt) is the right choice: dead matt, highly opaque, with an even flow and a calm finish, suited even to surfaces sensitive to raking light. You'll find tools for painting in the Pinsel and Malerrollen categories, and protection for floors and furniture under Abdeckmaterial.
matt or silk-matt after filling
The sheen also decides how visible a repaired spot stays. Matt scatters the light and forgives small unevenness — which is why re-box base one (matt) is the more relaxed choice on a much-patched wall. Silk-matt reflects more: re-box silk matte WEISS (seidenmatt) is especially hard-wearing and very easy to clean, but calls for a cleanly sanded surface. On lacquered surfaces with re-box protect, this matters even more, as the silky sheen of the lacquer shows up every ripple.
As a rule of thumb for quantity: one litre covers approx. 6–8 m² per coat. For two coats, that's approx. 8–10 m² from 2.5 L, approx. 15–20 m² from 5 L, and approx. 30–40 m² from 10 L. On freshly filled and uneven surfaces, consumption can be higher.
To check which shade ends up looking right on your prepared wall, it's best to test it beforehand with the Farbmusterbox 65 Stk. If you'd rather have the whole project in one box, you'll find it among the Renovierungsboxen.
Frequently asked questions about filling and repairing
How do I fill a drill hole properly?
First remove any loose bits and dust from the hole, then press the filler in with the filling knife and let it sit slightly proud. Once dry, sand the spot flush with grit 220.
Which grit do I need for what?
Grit 120 removes material and evens out ridges and edges, grit 220 is for the final, fine pass. If you only use one, you'll either leave the wall rough or fail to get rid of the ridges.
Do I need to prime after filling?
Usually not for a few small spots, but it's worth it on walls filled over a large area or ones that absorb strongly. The primer ensures even drying and reduces paint consumption.
Why can you still see the patched spot after painting?
Because the patch absorbs paint differently than the rest of the wall, and spot-painting only makes the difference stand out. So always paint the whole surface right up to the next edge — more on this in Wände streichen ohne Streifen.
How much filler do you need?
That depends on whether you're filling a few drill holes or levelling out a whole wall — holes and cracks use up far less than a full surface. The repair filler comes in a 1-kg tub, so count up beforehand how many spots you actually need to cover.
Can you also apply lacquer to filled areas?
Yes, but the surface needs to be clean, dry, stable and free of any loose material. For lacquer, the primer re-box core goes on first, followed by re-box protect.
How do you prepare the wall as a whole?
Clean, patch, sand, remove dust — in that order. The full process, with every step in between, is described in Wände richtig vorbereiten.


